
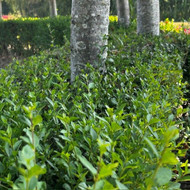
A well-planted hedge can screen a boundary, block wind, shelter wildlife and add real structure to a garden for generations to come. In the following section, we'll explain how to plant bare-root and container-grown hedging, prepare the ground, space your plants correctly, and give young hedging the best possible start.
Planting Hedging for Long-Term Success
A hedge is one of the longest-lived features in any garden. Once planted, it may remain in the same position for fifty years or more, so taking the time to plant it correctly is one of the best investments you can make. Whether you're establishing a formal Beech or Hornbeam boundary, a native mixed hedgerow for wildlife, or a low windbreak for an exposed site, careful planting will help your hedge establish quickly and grow away strongly from the very first season.
Many problems that gardeners experience later—gappy growth, slow establishment or plants that never quite thrive—can usually be traced back to poor planting conditions rather than the plants themselves. Fortunately, planting a hedge is straightforward once you understand a few simple principles.
At RV Roger Ltd, our advice is always the same: prepare the ground well, plant at the correct depth and spacing, and give the hedge the best possible start.
When is the best time to plant hedging?
Bare-root hedging
Bare-root hedging is supplied while dormant, without soil around the roots. It's available during the bare-root season, usually from November through to March, depending on weather conditions.
This is the traditional and often the best time to plant a hedge because:
- The soil is naturally moist.
- Cooler temperatures reduce transplant stress.
- Roots establish before spring growth begins.
- Bare-root plants are significantly more economical for planting in quantity.
Avoid planting if the ground is frozen or waterlogged.
If your bare-root hedging cannot be planted immediately, keep the roots cool and moist, and heel the plants into a spare piece of ground if there will be any delay. Never allow the roots to dry out, as this can reduce establishment.
Choosing the right location
Hedging plants are generally tougher and more adaptable than many garden shrubs, but they'll still perform best when grown in suitable conditions.
Sunlight
Most hedging species grow well in full sun to partial shade. A handful of shade tolerant varieties, such as Field Maple, Blackthorn and Wayfaring Tree, will cope well beneath established trees or on a north-facing boundary, but bear in mind that growth is usually a little slower in heavier shade.
Soil
Most hedging tolerates a wide range of soils, though free-draining, moderately fertile ground gives the fastest results. Species differ in their preferences: Hawthorn and Blackthorn will grow almost anywhere, while Sea Buckthorn prefers light, sandy conditions. If in doubt, ask us which varieties suit your soil type.
Exposure
For coastal or windswept sites, choose varieties bred to cope with salt spray and strong wind, such as Sea Buckthorn or Rosa rugosa. These same tough species also work well as an inland windbreak on any cold or exposed plot.
Preparing the soil
Good soil preparation pays dividends for years to come, particularly for a hedge that may stay in place for the rest of a garden's life.
Before planting:
- Remove perennial weeds along the full length of the hedge line.
- Dig or cultivate a strip roughly 60cm wide.
- Break up compacted soil, especially where machinery or construction traffic has been present.
- Incorporate plenty of well-rotted organic matter, such as garden compost or farmyard manure.
This improves both drainage and moisture retention while encouraging healthy soil biology. Because a hedge is planted once and expected to perform for decades, investing time in soil preparation along the whole run is well worthwhile.
Planting in clay soil
Heavy clay often worries gardeners, but most hedging performs well in clay provided drainage is reasonable.
If your soil is particularly heavy:
- Incorporate generous amounts of organic matter.
- Avoid working the soil when it is very wet.
- Ensure water doesn't collect and pool along the planting trench.
Organic matter gradually improves soil structure and makes heavy soils easier to work over time.
Planting in sandy or coastal soil
Light, sandy soils drain quickly and often contain fewer nutrients. Improving the soil with compost or well-rotted manure helps increase water retention and supports steady, healthy growth. Applying mulch each spring is particularly beneficial on lighter soils, and choosing naturally tolerant species, such as Sea Buckthorn, will make establishment easier still.
Spacing your hedging plants
Correct spacing makes a significant difference to how quickly a hedge fills out and how healthy it remains in the long term.
As a general guide:
- For a single row, space plants 30–45cm apart.
- For a denser, quicker-establishing hedge, plant a double staggered row, with two rows around 30–40cm apart and plants staggered so each sits opposite a gap in the other row.
- Wider spacing suits larger species such as Beech or Hornbeam; closer spacing suits smaller shrubby varieties.
Planting too densely wastes plants and increases competition for water and nutrients. Planting too sparsely leaves gaps at the base for years.
How to plant bare-root hedging
Planting bare-root hedging is straightforward and gives excellent results, even at scale.
Step 1 – Soak the roots
Before planting, soak the roots in a bucket of water for around one to two hours if they appear dry. This helps rehydrate the plants before they begin establishing.
Step 2 – Dig the planting trench or holes
For a run of hedging, a shallow trench is usually quicker than individual holes. Make it comfortably wide enough that roots can be spread naturally rather than bent or cramped.
Step 3 – Position the plants correctly
Plant each whip or transplant at the same depth it was growing previously, indicated by the soil mark on the stem. Spread the roots out evenly along the trench.
Step 4 – Backfill
Refill using the original garden soil, gently firming around the roots as you go. Avoid leaving large air pockets. There's usually no need to add large amounts of fertiliser directly into the planting trench.
Step 5 – Water well
Even during damp weather, give newly planted hedging a generous watering. This settles the soil around the roots and encourages good contact between the roots and surrounding soil.
How to plant container-grown hedging
Container-grown hedging follows much the same process. Water the pot thoroughly before planting. Carefully remove the plant from its container and gently tease out any roots that have begun circling around the outside of the compost. Plant at the same depth as it was growing in the pot. Backfill, firm gently and water thoroughly.
Should I use mycorrhizal fungi?
Many gardeners choose to apply mycorrhizal fungi when planting hedging, particularly for larger specimens or difficult sites.
These naturally occurring beneficial fungi form a relationship with plant roots, helping them explore a greater volume of soil for water and nutrients. They can be particularly useful when establishing a new hedge, although they are not a substitute for good soil preparation or correct watering. If used, the fungi should come into direct contact with the roots during planting.
Should I feed newly planted hedging?
Newly planted hedging doesn't usually require heavy feeding immediately after planting. The priority during the first few weeks is root establishment rather than vigorous top growth. If the soil has been improved with organic matter, this often provides sufficient nutrition until spring.
Regular feeding can then begin as active growth starts—see our separate guide to watering and feeding hedging for details.
Mulching after planting
Applying a generous layer of mulch along the base of a new hedge is one of the simplest ways to improve establishment.
Mulching helps to:
- Retain soil moisture.
- Suppress weeds and grass competition, which is one of the most common causes of slow hedge establishment.
- Moderate soil temperature.
- Improve soil structure as it breaks down.
Suitable materials include:
- Garden compost.
- Well-rotted manure.
- Composted bark.
- Purpose-made mulch mats, which are particularly effective at suppressing weeds along a new hedge line.
Keep mulch clear of the stems themselves to allow good air circulation and reduce the risk of disease.
Watering after planting
The first growing season is when a hedge needs the most attention. Water deeply whenever the soil begins to dry rather than giving frequent light sprinklings. Deep watering encourages roots to grow down into the soil where moisture remains available for longer.
Once established, most hedging becomes surprisingly resilient and requires much less frequent watering.
Should I stake or protect newly planted hedging?
In exposed sites, or where rabbits and deer are a problem, spiral guards or a low rabbit-proof fence along the hedge line can prevent significant damage in the first few years. Taller or top-heavy specimens may benefit from a single stake and tie until the roots are established.
Common planting mistakes to avoid
Even experienced gardeners occasionally make simple errors. Fortunately, they're easy to avoid.
Planting too shallowly or too deeply
Always plant at the same depth the plant was growing previously.
Skipping weed and grass control
Grass and weed competition around the base is one of the single biggest causes of poor hedge establishment.
Poor soil preparation
A hedge may remain in the same place for decades. Preparing the soil properly along the whole run saves many years of disappointment.
Incorrect spacing
Planting too densely wastes plants and increases competition; planting too sparsely leaves persistent gaps.
Forgetting to water
Even if rain is forecast, newly planted hedging benefits from thorough watering while it establishes.
The RV Roger Approach
A healthy hedge doesn't begin with trimming or feeding—it begins with planting.
By choosing suitable species for your site, preparing the soil properly, spacing plants correctly and planting at the correct depth, you're giving your hedge the best possible foundation for years of dense, healthy growth.
Every garden and boundary is different, and there's no single formula that suits every situation. Heavy clay, light sandy soils, exposed coastal sites and shaded plots under trees all present different opportunities and challenges. Taking these conditions into account before planting, and choosing the right species for your site from our range, is one of the simplest ways to ensure long-term success.
If you're unsure about soil preparation, spacing or choosing the right species, our team is always happy to help.